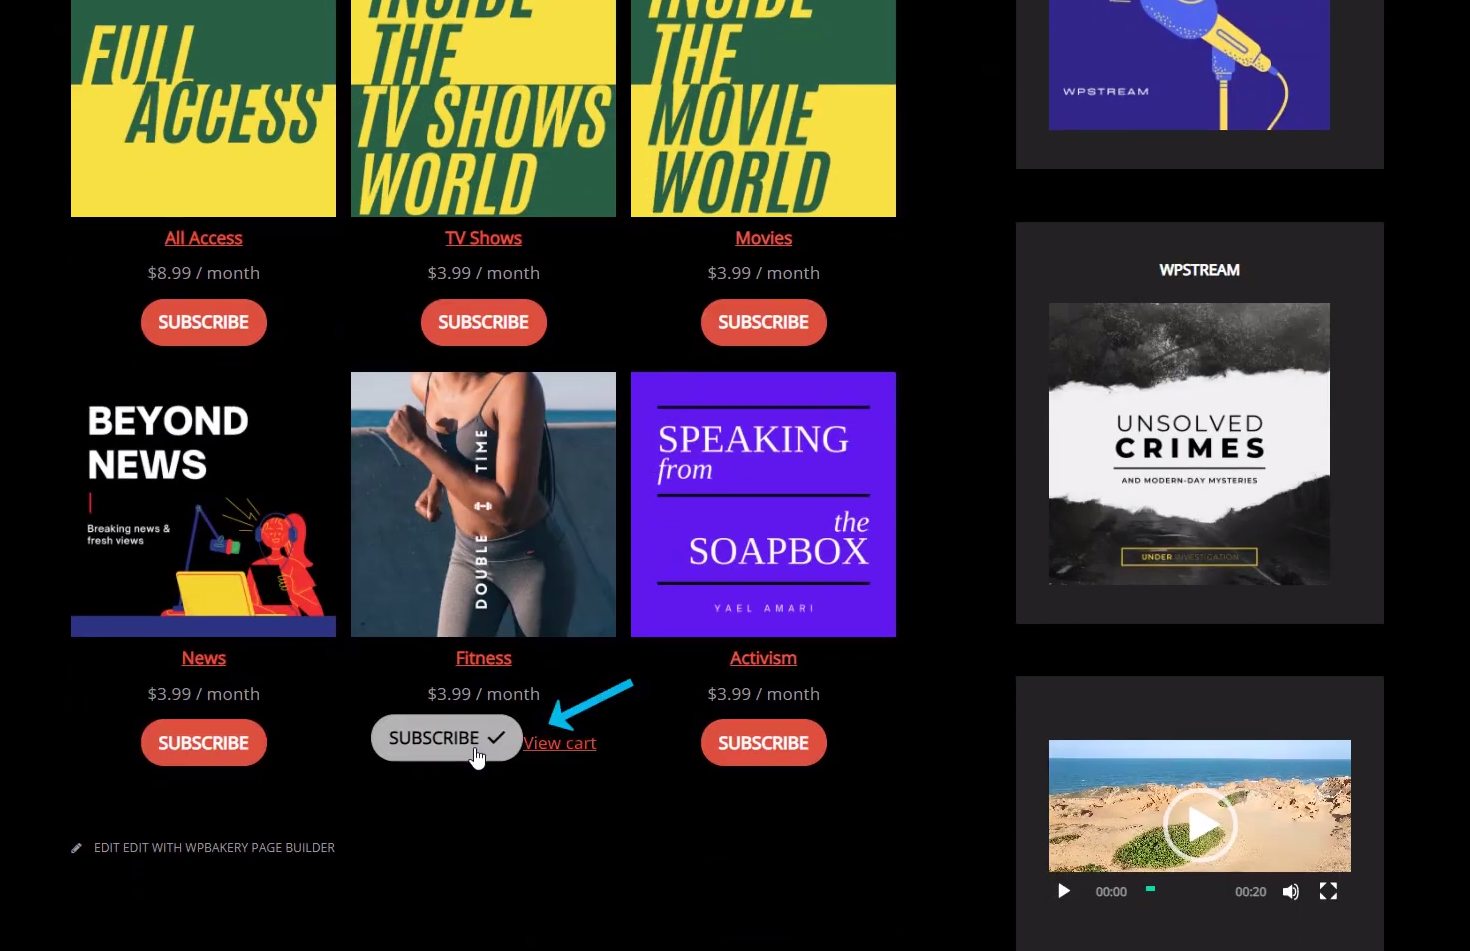
The ‘Multiple Subscription Plans’ system was created for those of you have a website that offers multiple types of streaming content. For example, if you are a teacher or have a website where students can be tutored by you or by a group of teachers, there could be different ‘courses’ or ‘subjects’ offered at a price. If a student wants help with History, they will subscribe to the ‘History’ plan and have access to all the content related to this subject. They will not have access to English, Science, or other subjects. A student can also purchase subscriptions to multiple subjects or alternative, purchase the ‘Global Subscription’ which gives them access to everything on the website.
These subscriptions can be applied to anything out there including gyms, online courses, trade shows, a streaming website, etc.
Part 1
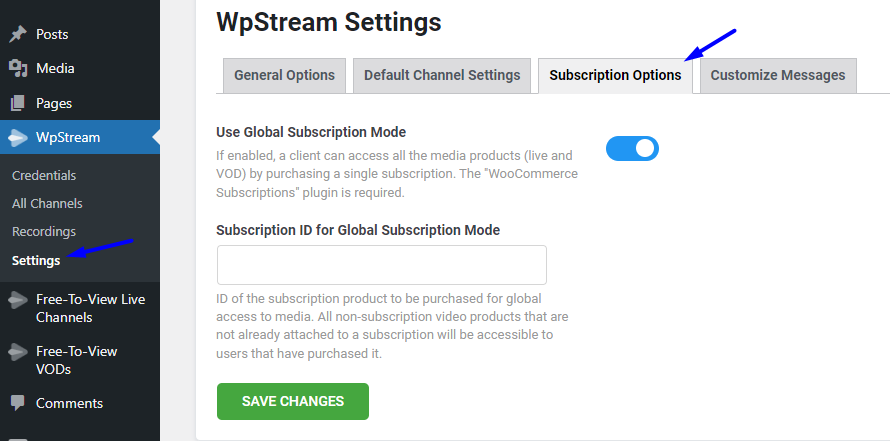
- Go to “WpStream Settings”. Under “Subscription Options”, leave the “Global Subscription Mode” enabled, delete the Subscription ID, and save your settings
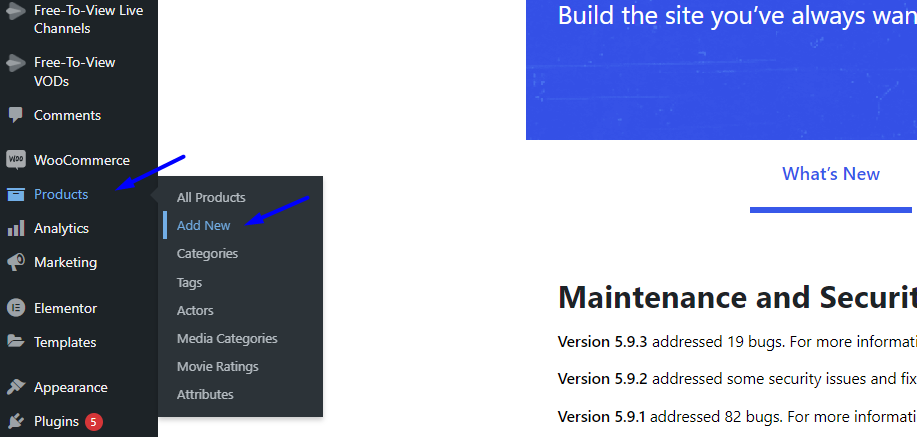
- To add a subscription plan, go to “Products” in your WordPress admin and “Add New”
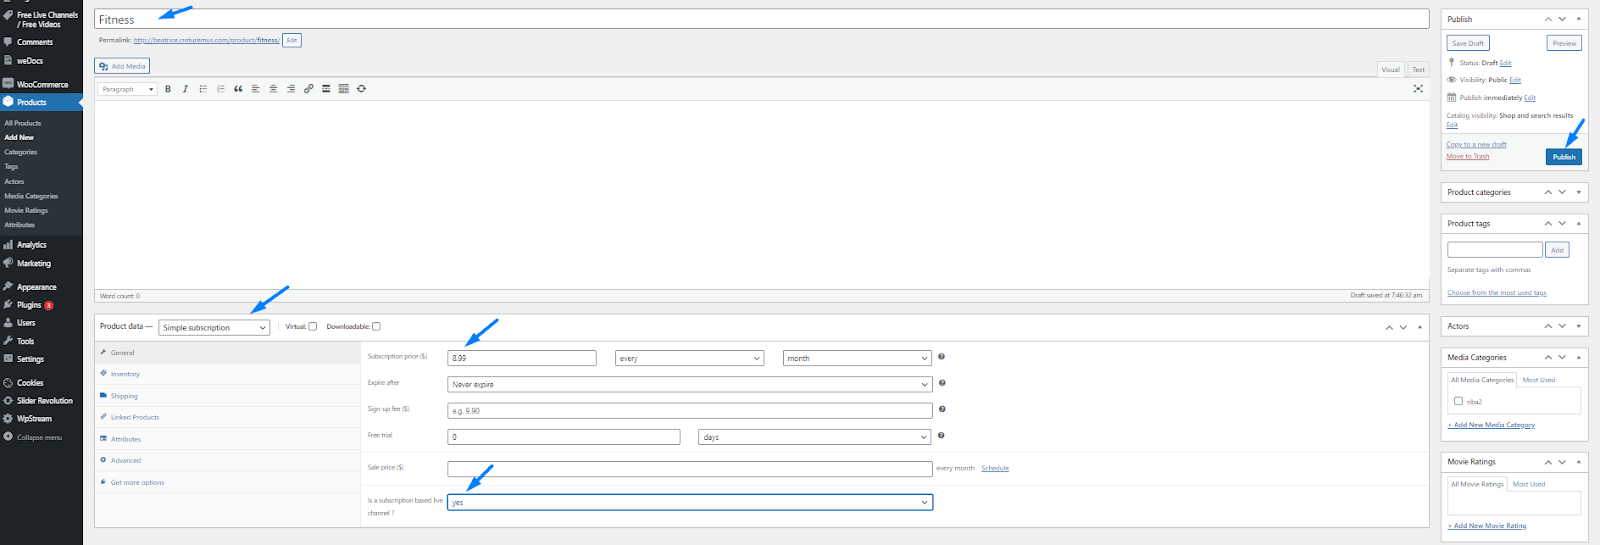
- Add a title (Fitness), a description, featured image, categories, and tags.
- Now, go to “Product Data” and change to “Simple Subscription”
- Add a “Subscription Price” and the recurring payment type
- You can also add whether this is a live or VOD product
- Once you are happy with your Subscription Plan, click on Publish
Part 2
- Add another product that will be available only to those who purchase this Subscription Plan and not available to those who have purchased other subscription plans
- Go to “Products” and “Add New”

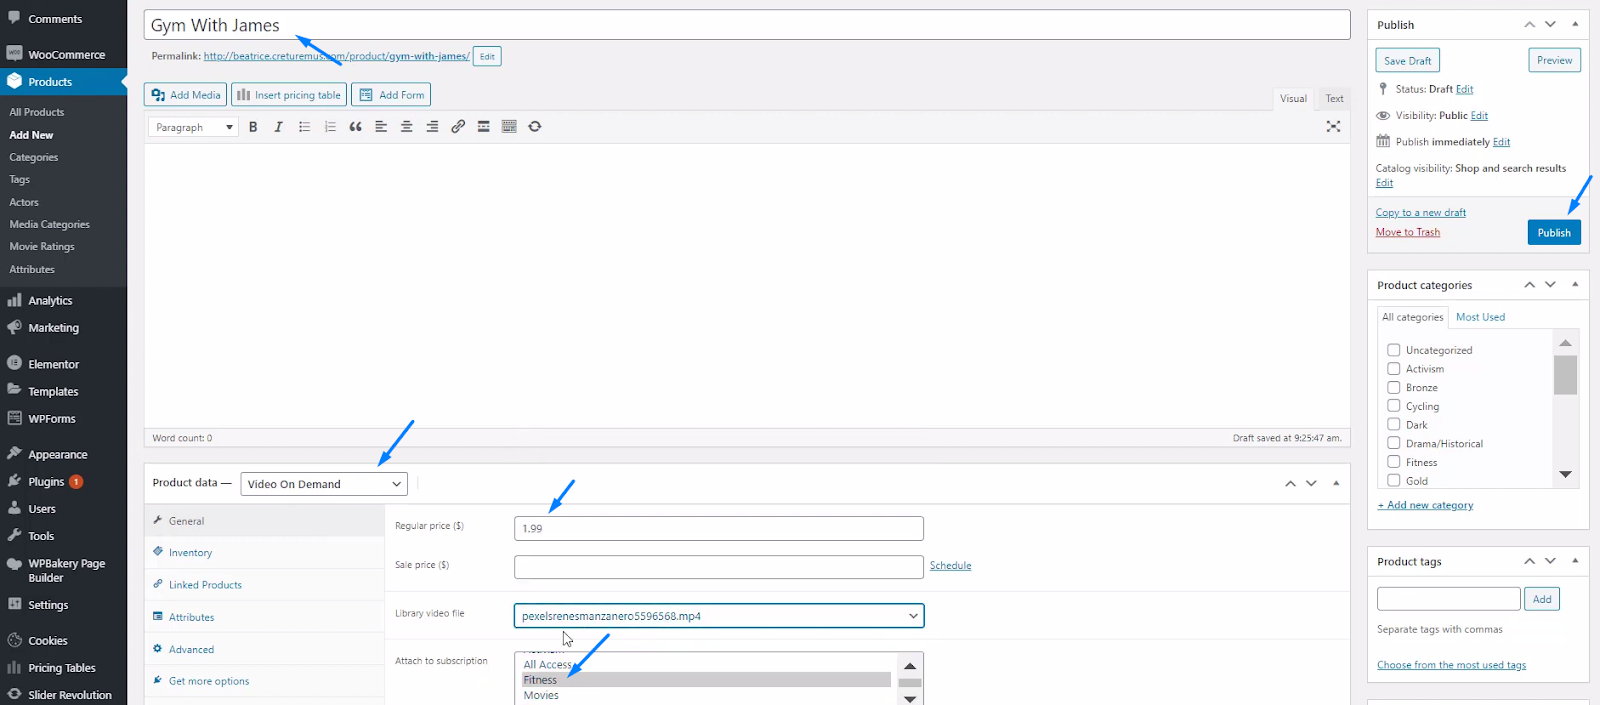
- Add a title (Gym with James), a description, featured image, categories, and tags.
- In “Product Data”, choose either a “Live Channel” or “Video-On-Demand”
- Give it a price, and in “Attach to Subscription”, click on the subscription plan Fitness.
- “Publish”
- Go to the product on your website and you will see that you have to purchase it to watch it

- Go to the Fitness subscription and purchase it
- After you have purchased it, go back to the Video-On-Demand and you now have access to it and can watch.
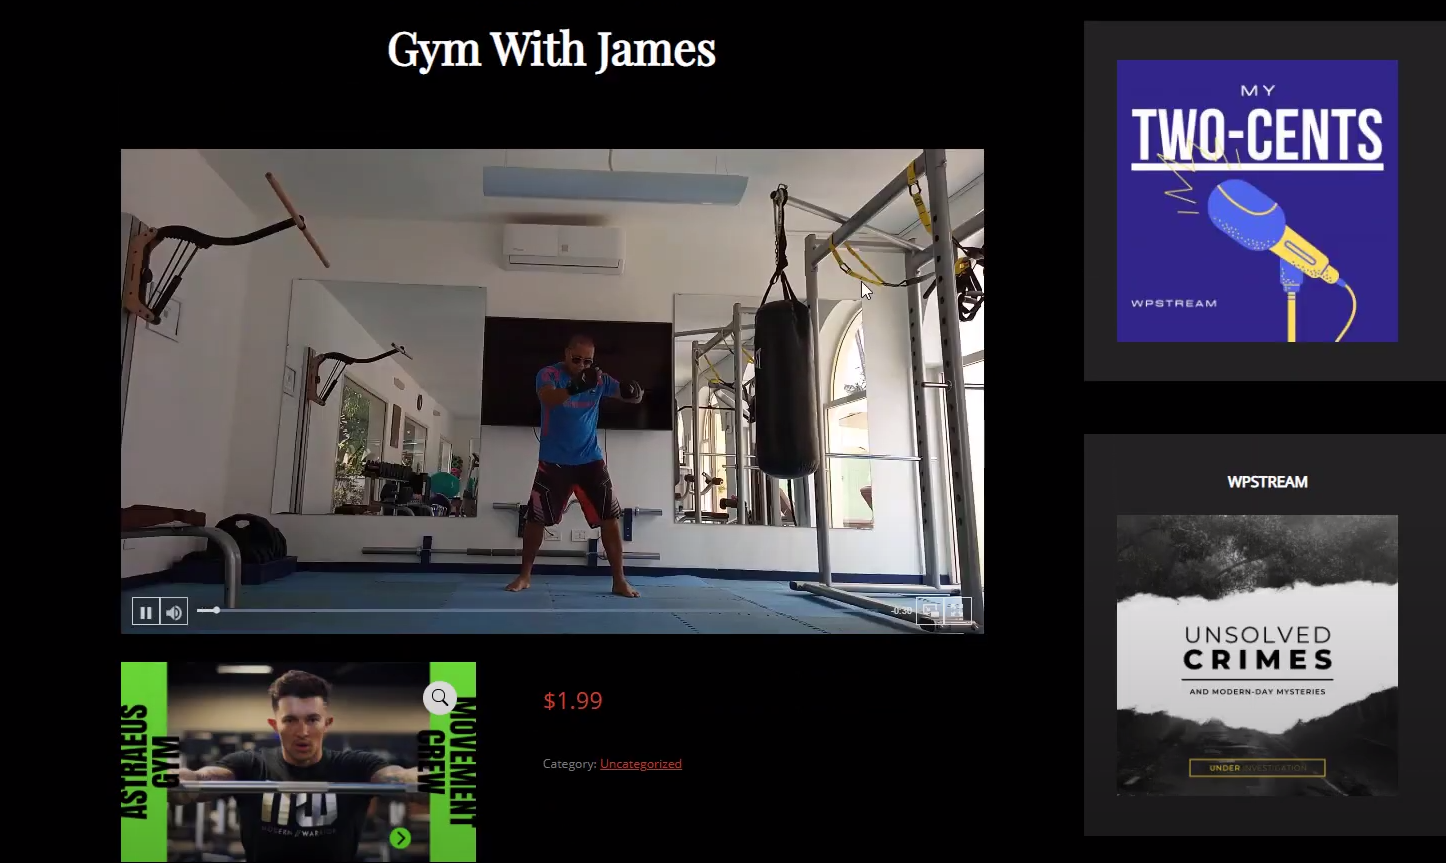
- Note that if you have created other Subscription Plans that a viewer has purchased, they will not be able to access “Gym with James” unless they purchase the “Fitness” Plan
- You can create as many videos and channels as possible and add them to a particular subscription plan.


