Table of Contents
BuddyBoss is an open-source platform where you will have 100% flexibility to fully customize your website based on your needs. Buddyboss helps you to create your platforms for various applications like selling online courses, Conducting live online classes for students, or training your employees for additional skills, etc.
WpStream has integrated with BuddyBoss to make it easier to GO LIVE on your website with the BuddyBoss process. What you will need:
- WpStream Plugin
- BuddyBoss Platform
To fully go in-depth and copy our exact steps, we also have the BuddyBoss Theme installed for this demo.
Admin Live Stream #
- Install and activate WpStream and BuddyBoss Platform.
- Set up the BuddyBoss Platform as described here
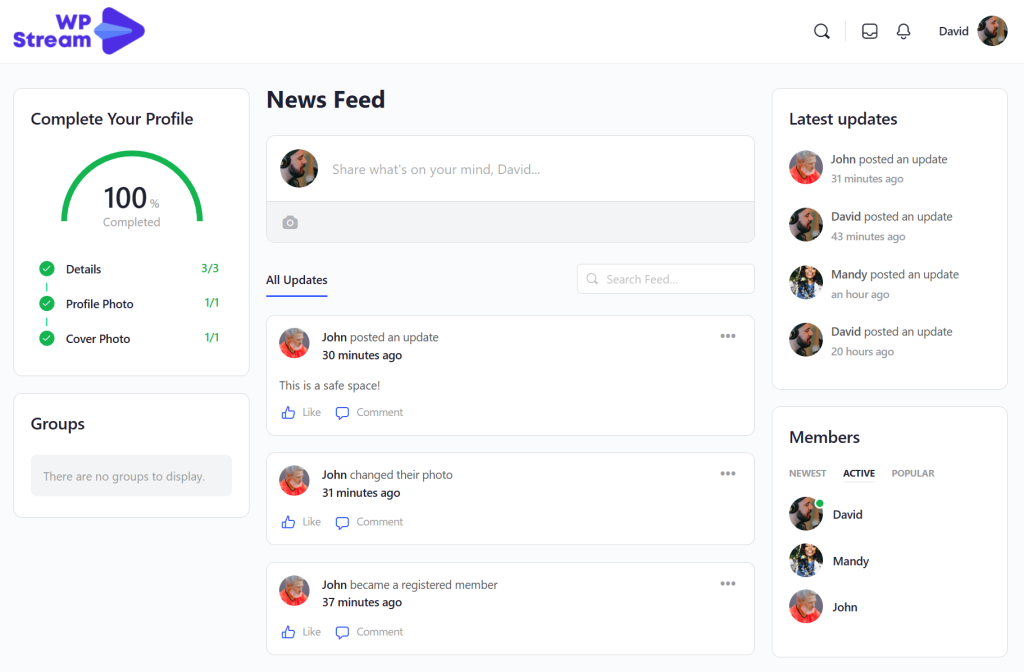
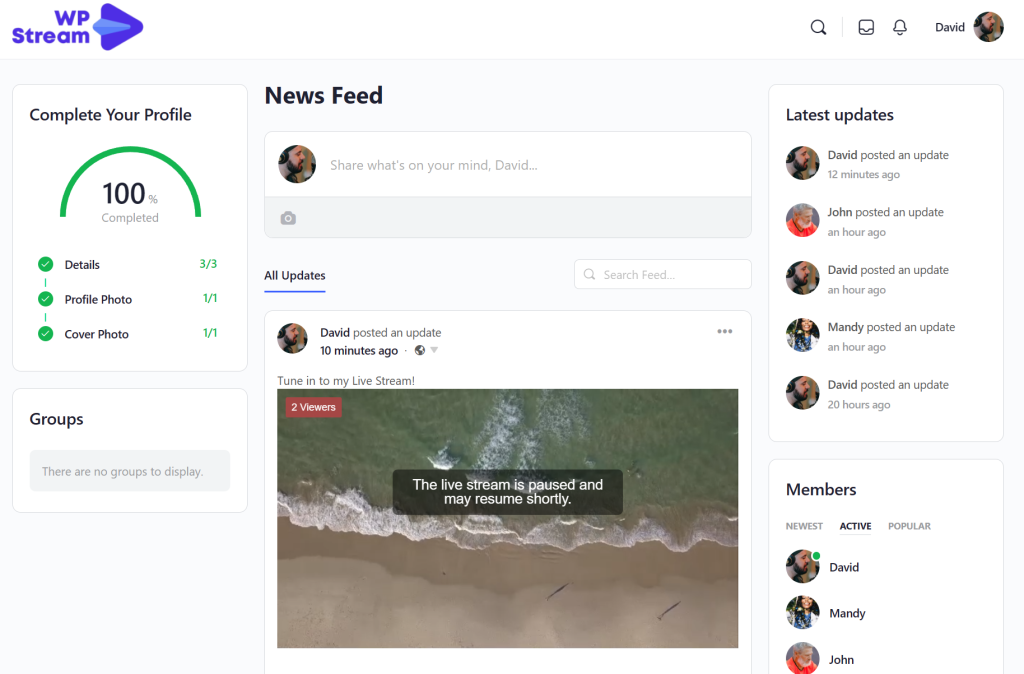
- After you set up your components, widgets, and your News Feed, it should look like this
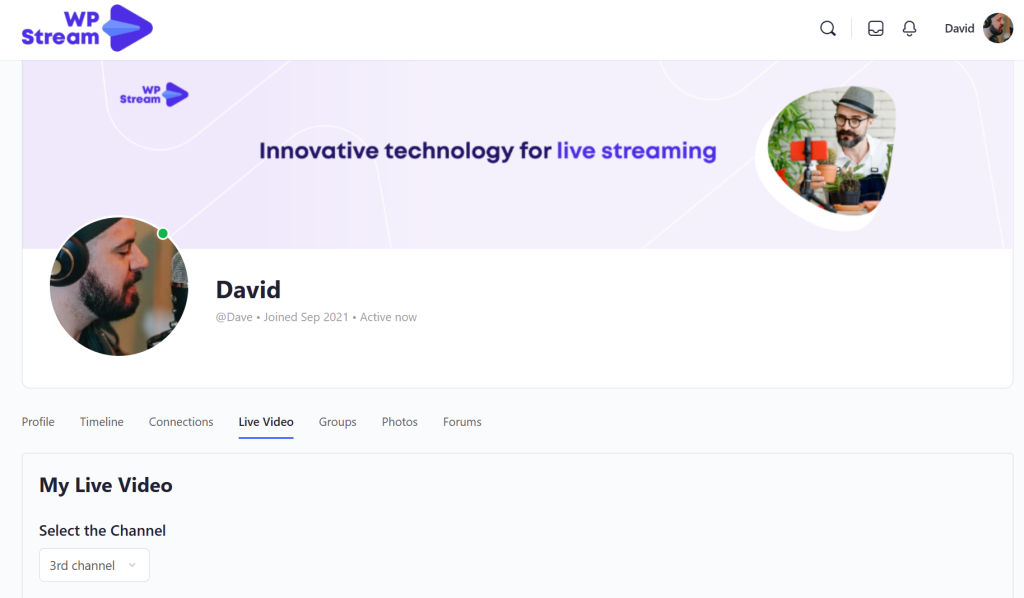
- We are now interested in going LIVE on our timeline. Go to your Profile under ‘Timeline’
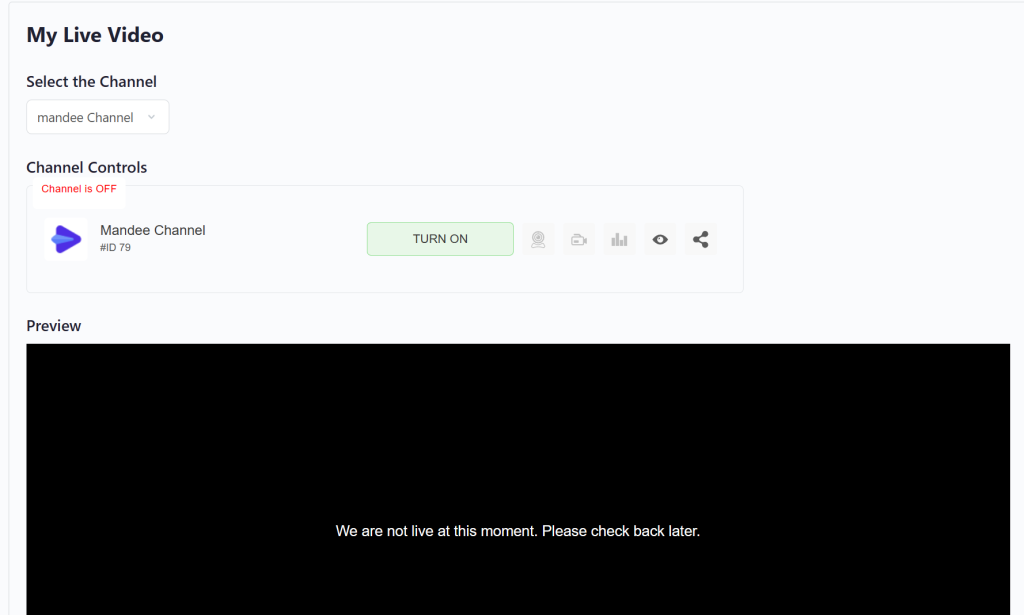
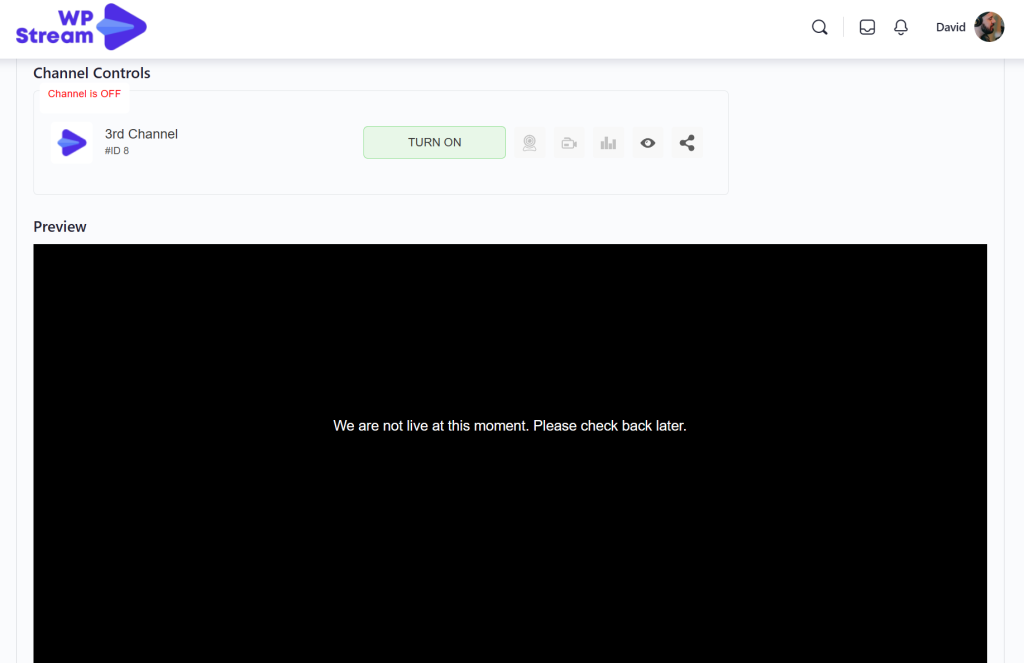
- In your profile, you will see the ‘Live Video’ option.
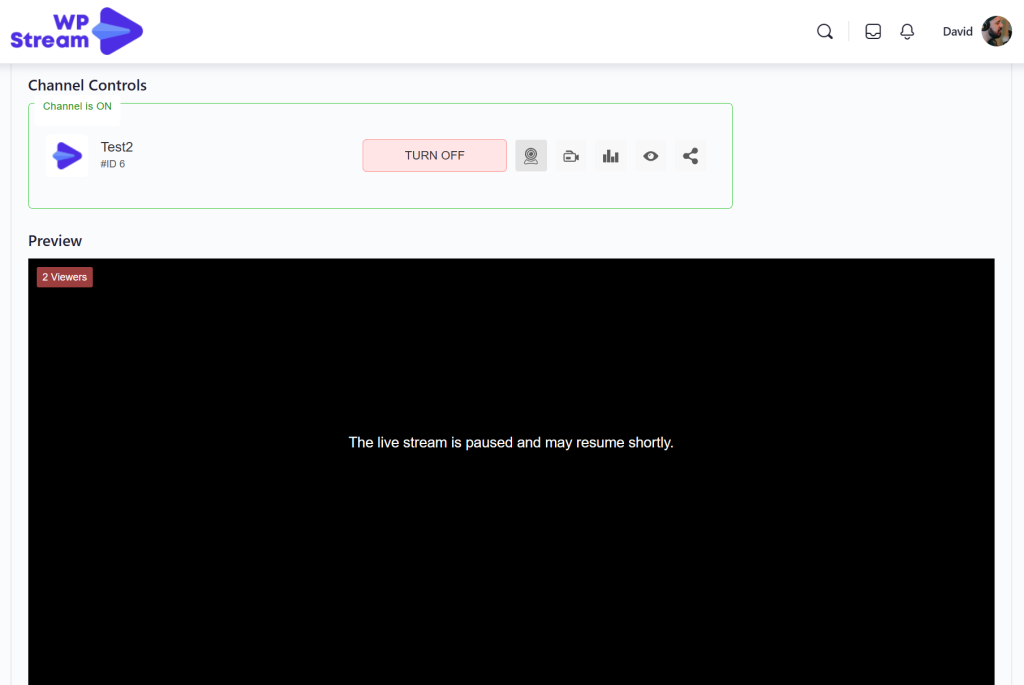
- Select your channel and click on ‘TURN ON’

- After your channel is ON, you can either GO LIVE via your browser or using an external streaming app.
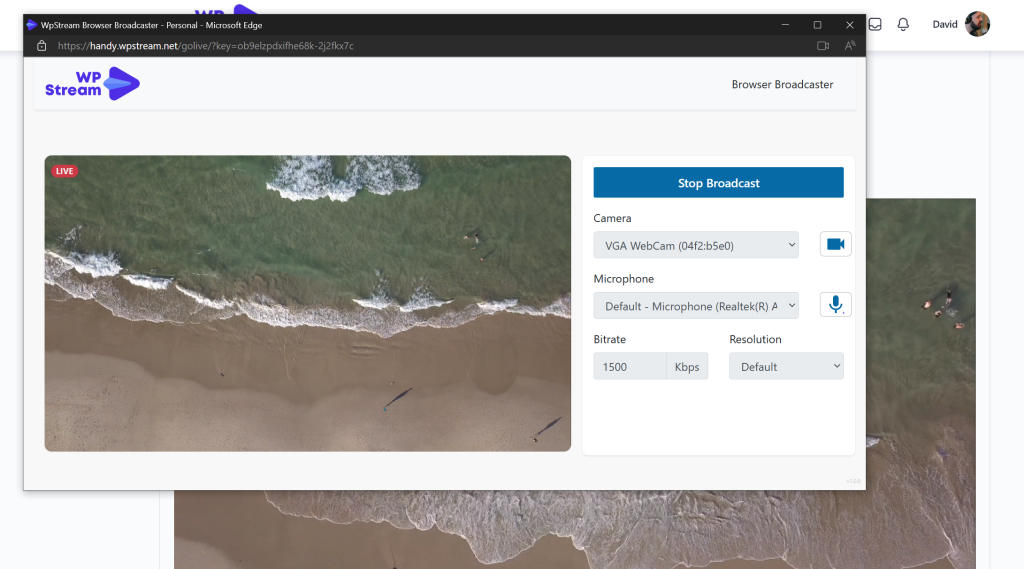
- For this demo, we are using our browser as it is the simplest way to live stream.
- A pop up browser will show up where you can choose your camera, mic, resolution, and bitrate.
- Click on ‘Start Broadcast’.
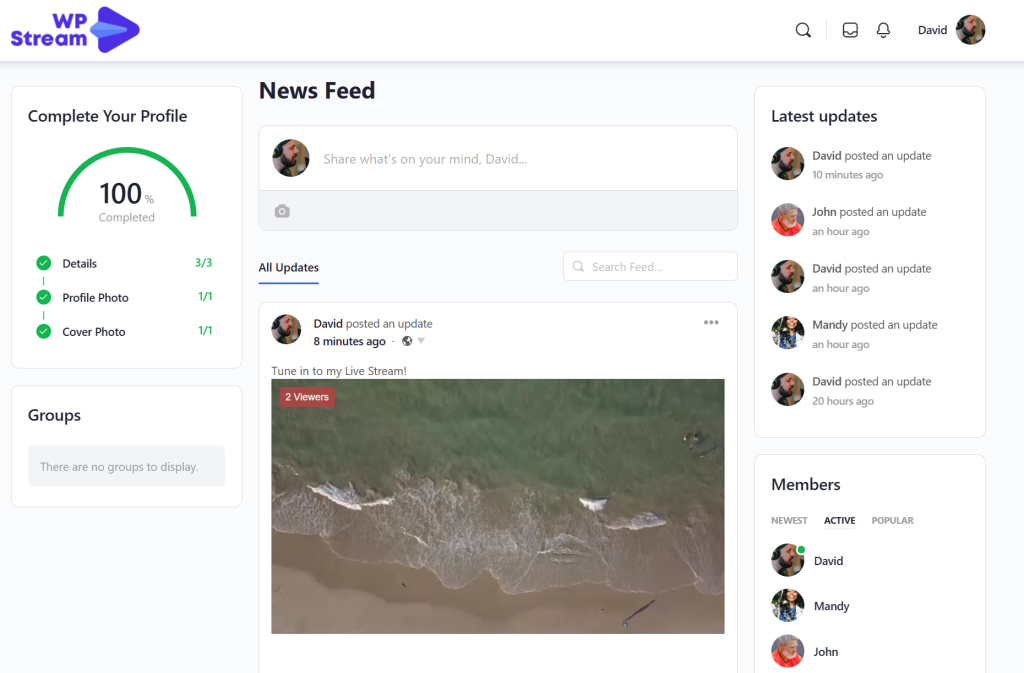
- If you go back to your timeline, you will see the live stream. Furthermore, go to your News Feed and you as well as your connections and other members will see your live stream as well!
- Once you are done, go back to the pop up browser and click on ‘Stop Broadcast’. The live stream will end and a message announcing this will show up on the player.
Other Users / Regular User’s Live Stream #
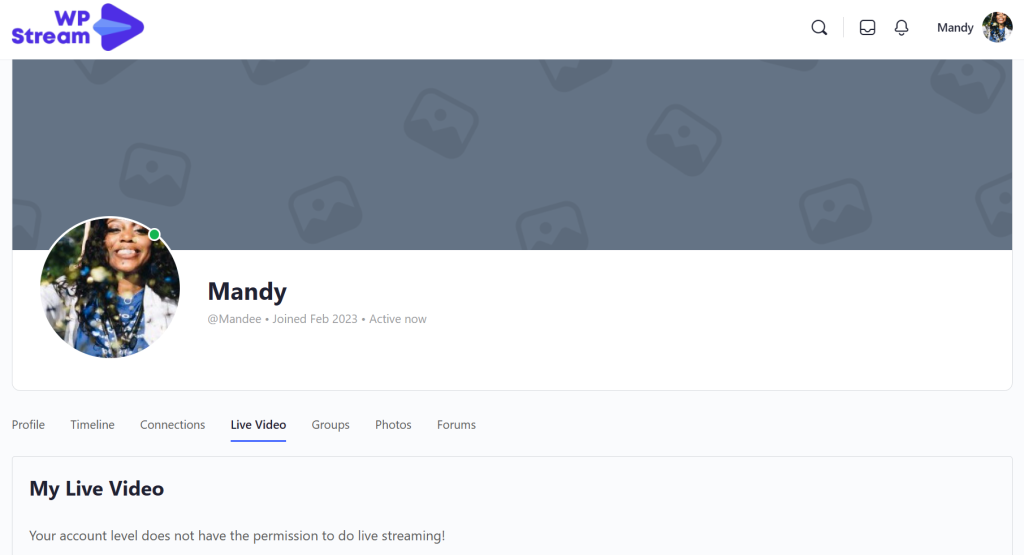
- By default, your users and other members that are not admins do not have access to live streaming. In order for them to Live stream on your website, they will need your permission.
- This is what a regular user without permission to live stream sees when they go to the ‘Live Video’ section in your profile
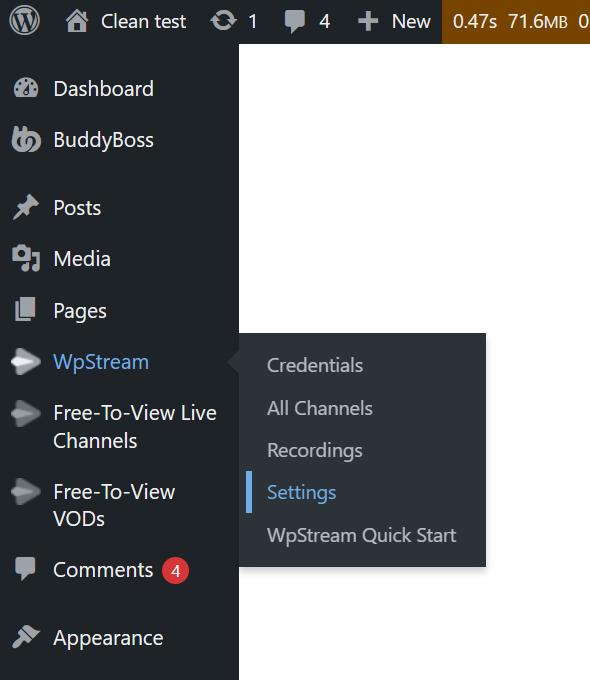
- To grant this user permission to live stream, you (the admin) must go to your website’s back-end and go to WpStream Settings.
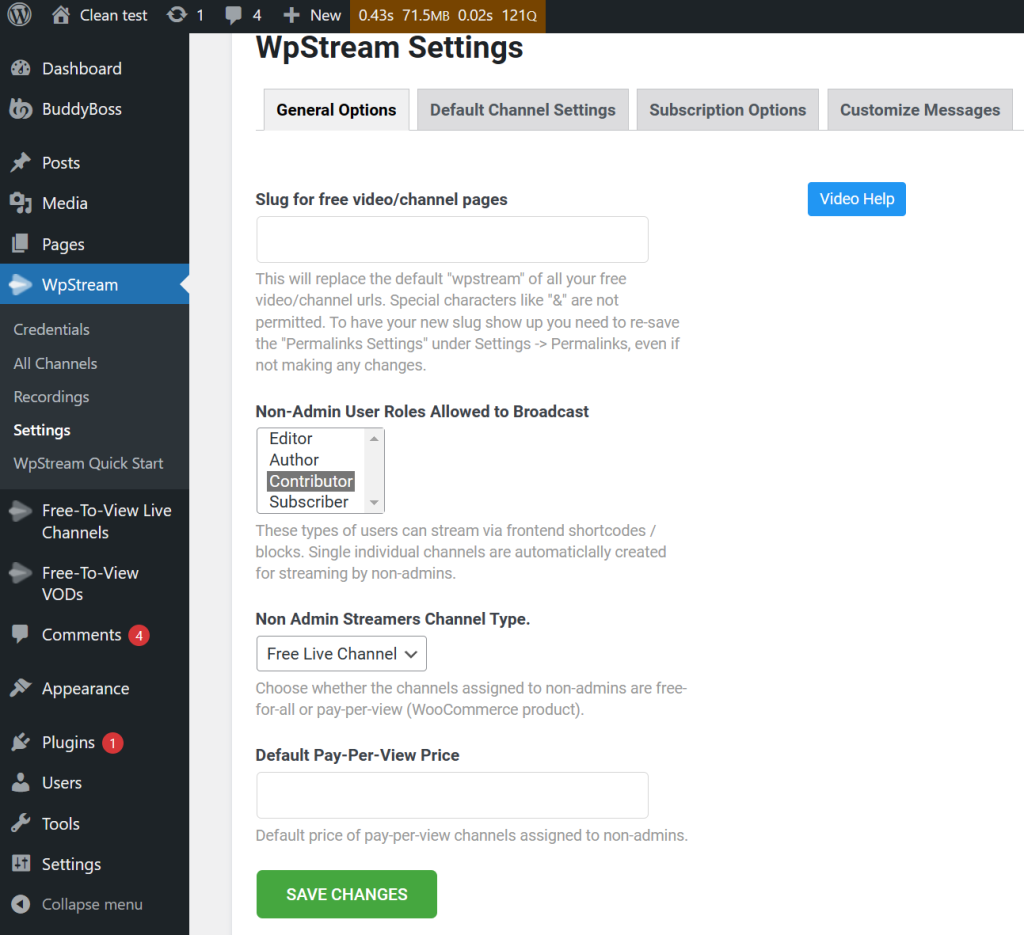
- Under ‘General Settings’ you will see ‘Non-Admin User Roles allowed to Broadcast’.
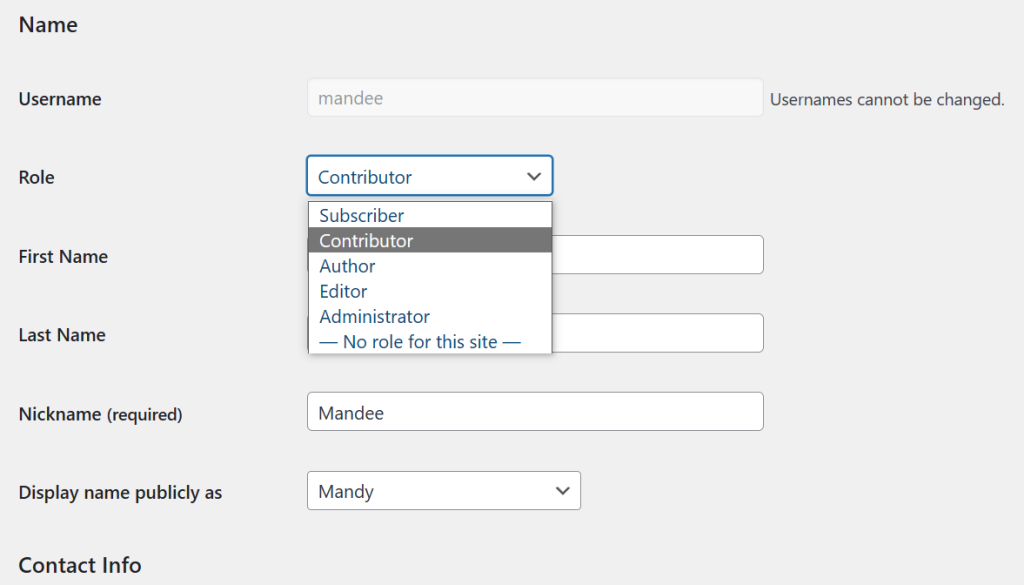
- Pick the roles that you want to grant access to. You can pick as little or as many roles as possible! For this demo, ‘Contributers’ will be allowed to live stream. Save Changes.
- Go to ‘Users’ and then to ‘All Users’. Find the user that you want to grant permission to live stream.
- Change their user role to ‘Contributor’ and ‘Save Changes’
- Have your user refresh their page and if they go back to their profile under ‘Live Video’, they now have their own channel and can GO LIVE.
- To Live Stream, they can repeat the same steps as listed above where they can live stream through their browser or using an external streaming app.